Since I started automatically testing my Rust crate with Travis, I had always wanted to test on iOS as well. Unfortunately, the default Rust compiler on Travis doesn’t support iOS, and compiling one from scratch takes a prohibitively long time. With Rust’s improved cross-compilation support, it’s now possible!
Travis configurations
We’ll be running our tests on Xcode’s iOS simulator, which means that these tests have to run on Travis’s OSX image. We’ll start with these Travis configurations for iOS builds:
language: rust
rust: nightly
os: osx
osx_image: xcode7.2
If you’ll be testing your library on OSX and iOS, I’ve found it convenient
to use an IOS_ARCHS environment variable; this variable lists all the
iOS architectures we should build, and will be empty for our OSX builds.
To build for all currently supported iOS architectures,
IOS_ARCHS can be defined as IOS_ARCHS="i386 x86_64 armv7 armv7s aarch64".
By using an IOS_ARCHS environment variable, we can take advantage of
Travis’s build matrix functionality
to have separate iOS and OSX builds:
env:
  - IOS_ARCHS=""
  - IOS_ARCHS="i386 x86_64 armv7 armv7s aarch64"
This will trigger two separate builds in Travis’s matrix: one for no iOS architectures (i.e. an OSX build) and one for all iOS architectures.
Setting up the cross compiler
The Rust compiler included on Travis is not able to compile for iOS. With Rust’s cross compiler support, though, compiling for iOS is just a matter of downloading the iOS versions of the standard library.
Following the rust-cross guide,
we can add a Travis install step
to install all the architectures we’ll be building for:
for arch in $IOS_ARCHS; do
    ios_stdlib="rust-std-nightly-${arch}-apple-ios"
    curl -O "http://static.rust-lang.org/dist/${ios_stdlib}.tar.gz"
    tar xzf "${ios_stdlib}.tar.gz"
    "./${ios_stdlib}/install.sh" --prefix=$(rustc --print sysroot)
done
Building an iOS library
The trickiest part about testing Rust on iOS currently is that
you cannot directly run the #[test]s you’ve written in Rust.
Rust’s testing infrastructure compiles tests into an executable to be run,
but executables on iOS have to be packaged as apps and signed properly,
a process best handled by Xcode.
I chose to extract some of my testing code into a library that could be called from iOS, and then wrote a simple iOS test project that would link and call these tests. The objc crate actually has a Python script to parse out the tests from the project to be included in a crate for external tests; ideally this will someday be replaced with a custom test harness.
The code we’d like to test on iOS has to be compiled to a static library,
as support for dynamic libraries on iOS was only added recently and
Rust does not yet support them.
To compile to a static library, simply add the
crate-type key
to the lib section of the Cargo.toml for your test library:
[lib]
crate-type = ["staticlib"]
The test code that will be called from our iOS app must be properly exposed like any Rust code called from C:
#[no_mangle]
pub extern fn rust_lib_test_functionality() -> c_int {
    ...
    // Returns a non-zero code for test failure
    if success { 0 } else { 1 }
}
Great! Now we have a static lib exposing some test functionality that we’ll call on iOS.
One last thing: iOS libraries support multiple architectures, so to test
on multiple architectures we’ll want to combine the different builds of
our library using the lipo tool:
for arch in $IOS_ARCHS; do
    cargo build --target "${arch}-apple-ios"
done
lipo -create -output "${LIB}" target/*-apple-ios/debug/"${LIB}"
iOS test project
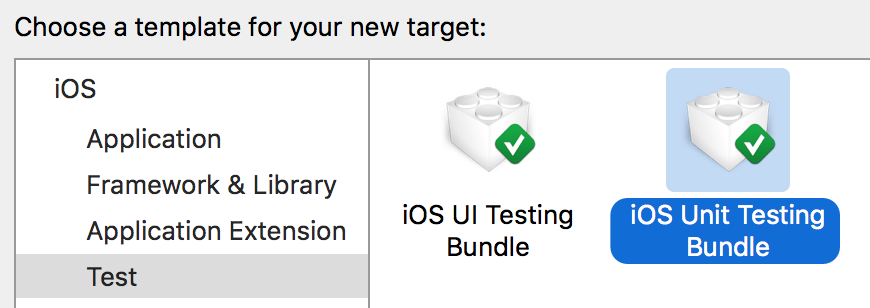
Now that we have our library of test code to call from iOS, we can create an iOS test project. Starting out from an empty project in Xcode, we’ll add a new iOS unit testing target:
Next, drag your compiled library of Rust tests into the “Link Binary With Libraries” section of the “Build Phases” for your test target.
Now we’re ready to write an XCTestCase verifying the functionality of
the Rust library:
int rust_lib_test_functionality();

@interface RustLibTests : XCTestCase
@end

@implementation RustLibTests

- (void)test {
  int result = rust_lib_test_functionality();
  XCTAssertEqual(result, 0, "Test failed with a non-zero code");
}

@end
At this point, we can run our tests from within Xcode and should see a nice green checkmark if it’s passing on the iOS simulator!
Running on Travis
The last step is simply adding a
Travis script step
to run our iOS tests.
One caveat, first: running tests from a script requires a shared scheme, so
make sure the test target scheme is shared and the .xcscheme file committed.
This can be done in Xcode from the
“Product” > “Scheme” > “Manage Schemes…” menu:

Now, we can add a script step using xcodebuild. xcodebuild takes
a multitude of options,
but if your project and scheme were named RustLibTests,
running your tests on an iPhone 5 and 5s simulator (32 and 64-bit,
respectively) could be done with the following command:
xcodebuild \
    -project RustLibTests.xcodeproj \
    -scheme RustLibTests \
    -destination 'platform=iOS Simulator,name=iPhone 5' \
    -destination 'platform=iOS Simulator,name=iPhone 5s' \
    test
And there we have it! Now, Travis will run our tests on an iOS simulator to verify that our crate is working.
For an example of this in action, check out the objc crate. It may seem like a lot of hoops to jump though, but I am impressed with the ease of setting up Rust itself for cross-compilation.